Running the Fuel Lines

I spent quite a bit of time under the car looking for the best place to run my fuel lines. I needed two hose-in-hose (see below for an explanation) which ran from the trunk where the WVO tank will be located to under the hood. I've seen conversions where the lines were ran inside the car under the carpet, and I've seen conversions where the lines were ran under the car. After much contemplation and examination of the car and schematics of the car I decided to route my lines under the car.

After studying other conversions of this car and laying under the car for what seemed like forever I decided to follow the existing fuel lines. The big question was where to enter the trunk. I noticed there was quite a bit of unused space just to the left of the stock fuel tank behind the stock fuel tank mounting bracket. The only problem I could see with this location was I would have to remove the fuel tank, and my fuel tank was almost full. So I put off pulling the fuel tank for a week to burn off some fuel. I then drained the remaining fuel and pulled the tank.

After pulling the stock fuel tank I drilled two holes next to each
other and then cut away the "little triangles" between the holes. I then filed the edges smooth.


To protect the hose-in-hose set up from rubbing and most likely getting cut on the metal edges I slit a section of 3/8" fuel line and slid it over the edge of the sheet metal. This fuel line was then glued in place using silicone.


****The need for two hose-in-hoses****
First off a diesel engine does not burn all of the fuel delivered to the engine. The unburnt fuel is sent back to the fuel tank. So, in a WVO conversion there is a need to provided a return line back to the WVO tank to avoid cross contamination between the two fuels.

So why the hose-in-hose set up?
There is a heating element inside the WVO tank to heat the oil in the tank. This heating element gets its heat from the cooling system of the car. So there is a need to run two lines to carry coolant from the engine bay to the heating element in the tank. Well if you are running the lines to carry the coolant you might as well run the WVO fuel line inside of them to heat the WVO while it travels to the engine bay. Each heating element with in the system can only heat the WVO by a certain amount. So if you figure the WVO fileter housing can raise the temprature of the WVO by 10 degrees and the WVO starts off at 60*F then the filter housing will raise the WVO to 70*F. So, if you can heat the oil (via the hose-in-hose set up) to 90*F by the time it gets to the WVO filter housing then not only will the filter perform better, but the temp of the WVO that leaves the WVO filter will be even hotter.

Some people favor a hose on hose set up, however in my professional opinion there is too much heat lost to the environment and the rubber lines make poor conductors. This is also one of the reasons why I used aluminum for my fuel lines. Aluminum is a great conductor of heat and allows the heat from the coolant to be transferred to the WVO.

Mounting the WVO Filter

One thing that is important to me with this conversion it to relocate as few of the existing components of the car as possible. I found that the heated filter housing supplied by fossilfreefuel.com would fit under the hood right next to the windshield washer reservoir without relocating anything.


I know there are other heated filter housing which may perform better, however none of them will fit where I wanted to put mine. Living on the Central Coast of California (San Luis Obispo) I do not face many of the problems with cold temperatures that people do back east or in the northern states.

I drilled a coulpe of holes in the side of the engine compartment large enough for the expansion bolts I used to mount the housing.


Mounting the Control Valves -& FPHE

I've seen E300D conversions with the valves mounted in various places around the engine bay. Some mount them under the intake manifold, some mount them to the sheet metal around the bay squeezed between stock components and some have brackets and mount them to the intake manifold. I am attempting to do this conversion with out removing the intake manifold, and I think the cleanest place is on the intake manifold. So I drilled and tapped a couple of holes in the manifold, and welded together a bracket to mount on the manifold. I also drilled and tapped the bracket so I could mount the valves with out needing nuts.

For the Flat Plate Heat Exchanger (FPHE) I welded together a bracket that screws to existing holes in the engine block right above the turbo. I know this portion of the engine compartment gets quite hot, but since the whole point of the FPHE is to heat the veggie oil I didn't see a problem with the heat. Here are some pictures of the FPHE and the valves.


The Tank -1.2

Once the tank was finished I cut an access hole in it. I then filled the tank with water and a little liquid dish washing soap to break the surface tension of the water (water has a high surface tension so sometimes it wont leak out of really small holes). That's Bailey behind the tank. When I get the my sending unit it will be mounted along with the fuel pick up in the access cover plate ... oh, and of course he tank didn't leak. The next step will be to attach "tabs" inside the lip of the tank. The aluminum I used for the tank is 0.090-inches thick ... not thick enough to tap to screw the access cover plate to. I will attach the tabs to the inside of the tank and then drill and tap through the tank and tab so I can screw the access cover plate in place.

The Tank - 1.1

People often ask why I work full time and then teach 3 days a week before work and 1 day after work at Cal Poly, San Luis Obipo (California Polytechnic State University). I do it because I LOVE teaching and giving back, it's fun, and the BioResourse and Agricultural Engineering Department has one of the best shops between LA and San Francisco. So one night after work we (my buddy and co-worker Matt, who can never get enough time in the shop) and I cut out and formed the tank. Then another night we (Me, Matt and my buddy Jeff who welded the tank for me) went back to the shop to finish the tank, and make the brackets for the FPHE. To keep the WVO from sloshing around in the fuel tank we added 2 baffels in the tank. Here are some pictures of the tank, and of the shop.


Touch Screen Controller

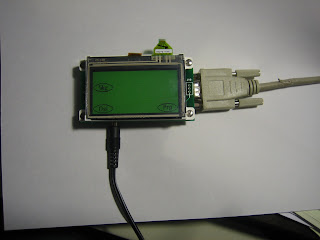
When I do things, I like to really do them ... a lot of WVO conversions use switches and lights to switch modes and to tell you what mode you're in. There are a few companies out there that make interactive controllers. I thought I'd take it one step further and use a touch screen to both control my system and for an indicator as to what mode I'm in. I ordered the touch screen from TVI Electronics. The brains of the controller will be a basic stamp which I got off eBay but has not yet arrived. Here was my first idea for the main menu, but I think I'm going to change it to icons instead of letters.

The Tank - 1.0

I considered many options for the tank. One option was to do what I did in the oder Mercedes and mount a round tank in the spare tire well. After much thought and research I decided that I would make a wedge shaped tank and mount it in the back of the trunk just behind the diesel tank. My first version was 6" across the bottom, 17" across the top, 17" tall and 37" wide. This set up would give me almost 30 gallons. However, the more I thought about it the more I thought I wanted to be able to fit two suitcases in the trunk. The first design only allowed me to fit one suitcase. The design I settled on is 6" across the bottom, 12" across the top, 17" tall and 37" wide. I'm hoping to cut out the aluminum next week and start construction.


Finding a location for the FPHE - Flate Plate Heat Exchanger

I've been looking for a good place to mount the FPHE. I'm thinking about making steel brackets and mounting it above the trubo


Ordering Parts

Well I've started ordering parts. So far I've ordered the basic stamp and touch screen for the controller, the aluminum fuel line, the aluminum for the tank and the tank heater.

I'm short on time these days but once I get more time I'll post pictures of the tank mock up


Let the journey begin - History

I first got into WVO (waste vegetable oil) in about 2004. My primary motivation was the fact I'm a bit of a tree hugger and I want to do my part. Now that diesel is $5+/gal here in San Luis Obispo, CA it's become quite a financial benefit too. My first venture was a 1983 Mercedes 300D Turbo. I converted the car using a kit from greasecar.com. The car ran so well on WVO that I wanted to get a newer car.


I looked around and set my sights on a 1999 Mercedes E300D. The only problem was I couldn't find one in California. So on 12/6/06 I flew to North Carolina and drove home my new (used car).


I was hoping to convert the car with a kit from Frybird.com (in my opinion the best kit out there) but after over a year and a half of waiting I've decided to take matters into my own hands. I figured that if couldn't convert my car on my own that Cal Poly should come to my house and take my masters degree in mechanical engineering away from me.

Much of my plumbing information came from Jake's blog (see link at the bottom of the page)